In this lab, we will use Microsoft PowerPoint to create a presentation. At the end of the lab, we will be handing in the presentation that we produced. The final format of the presentation (which consists of 3 slides) is shown below. Make sure to save your document frequently if you are creating it step-by-step during the lab. The file name should be lab5.pptx.
Presentation software such as Microsoft PowerPoint makes it easier to create and display information during presentations. Using Microsoft PowerPoint is very similar to Microsoft Word except the goal is to produce a result that looks good and is useful for presenting rather than simply conveying information in text form.
The most important challenge when developing a presentation is to make the information concise and to the point without losing the key facts that must be conveyed. The second important challenge is to chose fonts, colours, and display formatting that makes it easy for the viewers to grasp the information being presented.
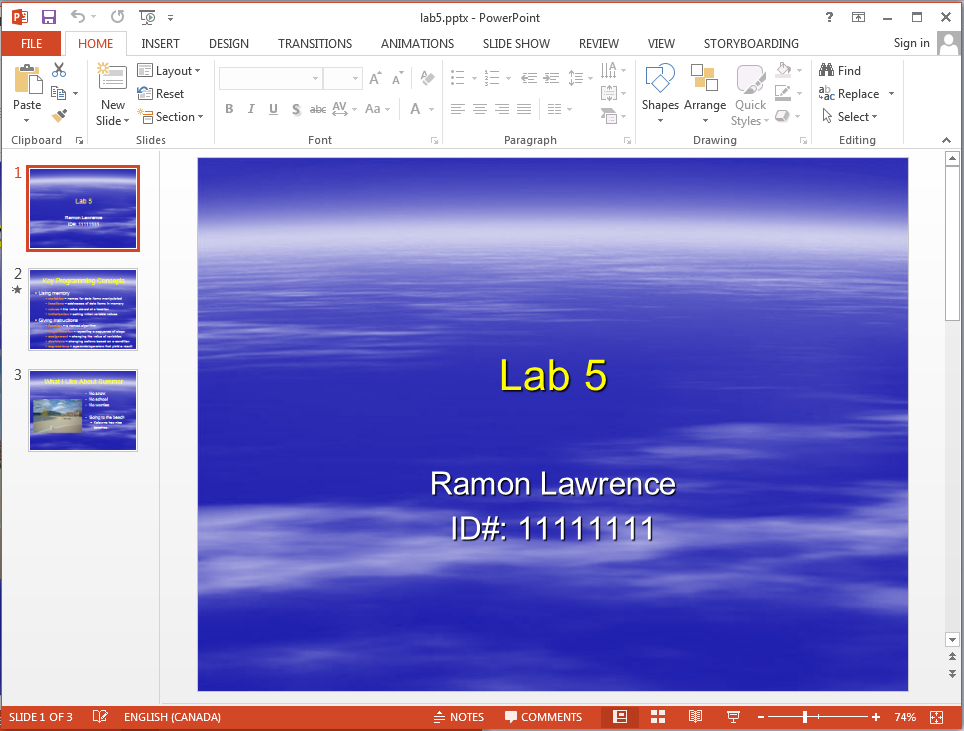
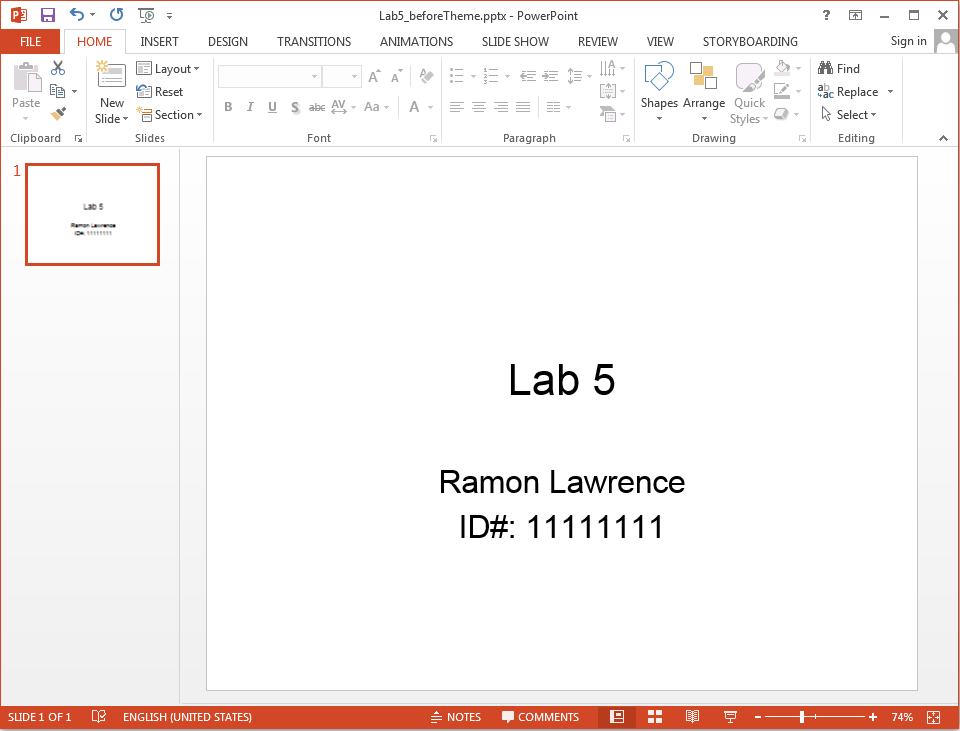
When you first open PowerPoint, it will create you a blank presentation and show you the first slide. On the left side of the screen you may see the presentation preview bar which shows some nearby slides in the presentation. On the first slide, called the title slide, put the text "Lab 5" in the title area. In the subtitle area, put your full name and student number.
TASK: Open Microsoft PowerPoint (Start->Programs->Office 2013->PowerPoint) and fill in title slide.
To create a new slide, click the New Slide button in the Home tab. This will create a new slide after the slide you are currently viewing.
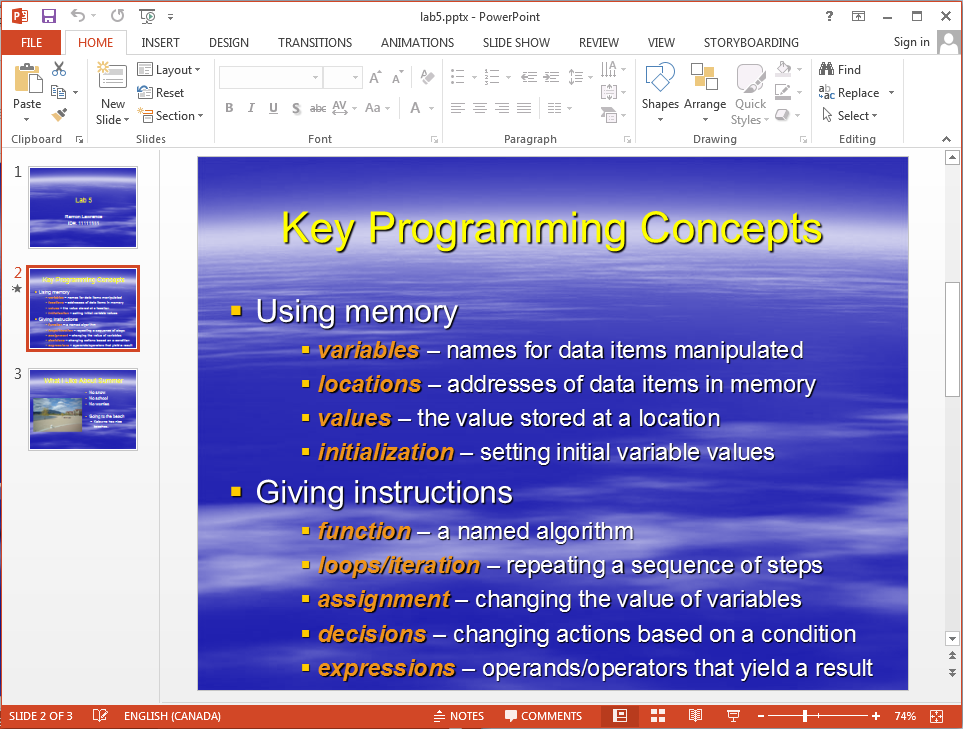
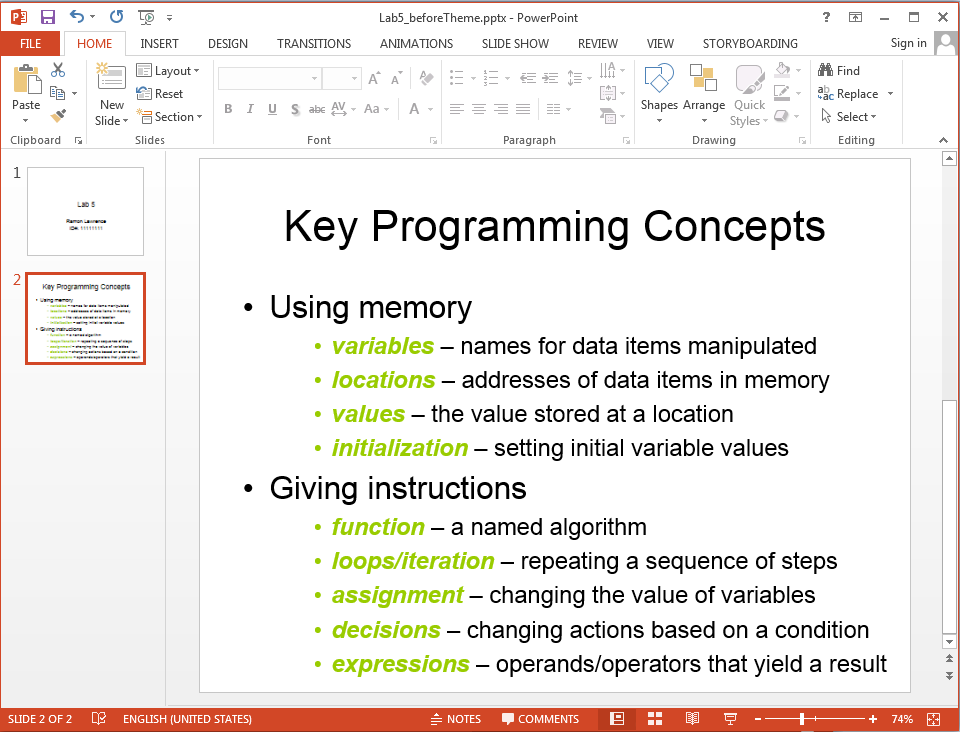
TASK: Create a new slide. Make this second slide have a bulleted list and appear as below.
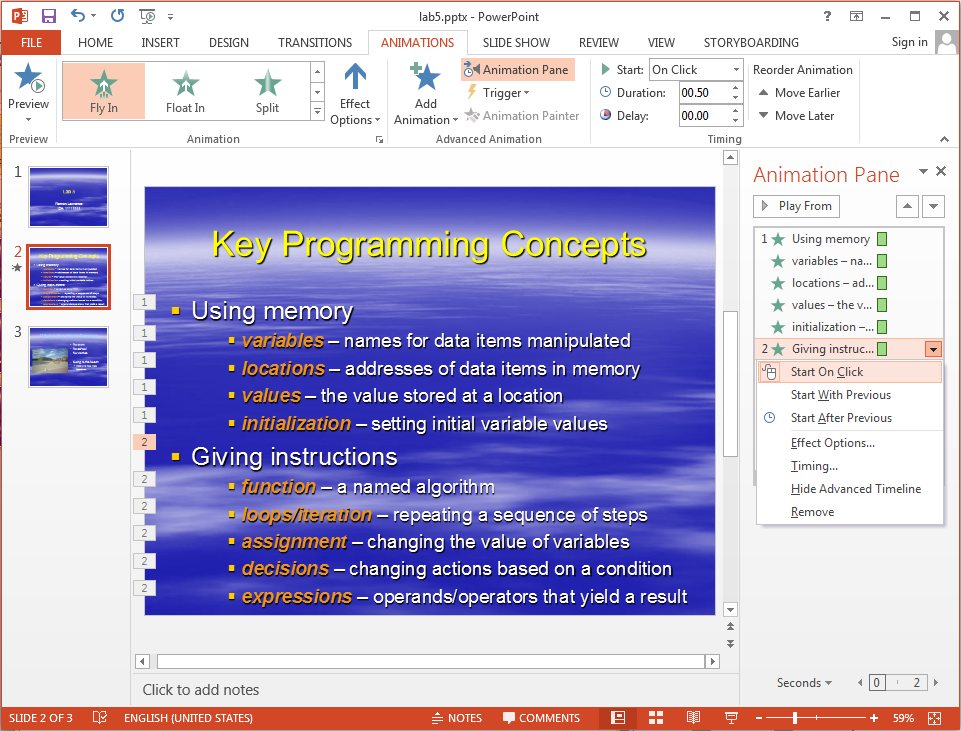
Using memory
	variables - names for data items manipulated
	locations - addresses of data items in memory
	values - the value stored at a location
	initialization - setting initial variable values
Giving instructions
	function - a named algorithm
	loops/iteration - repeating a sequence of steps
	assignment - changing the value of variables
	decisions - changing actions based on a condition
	expressions - operands/operators that yield a result
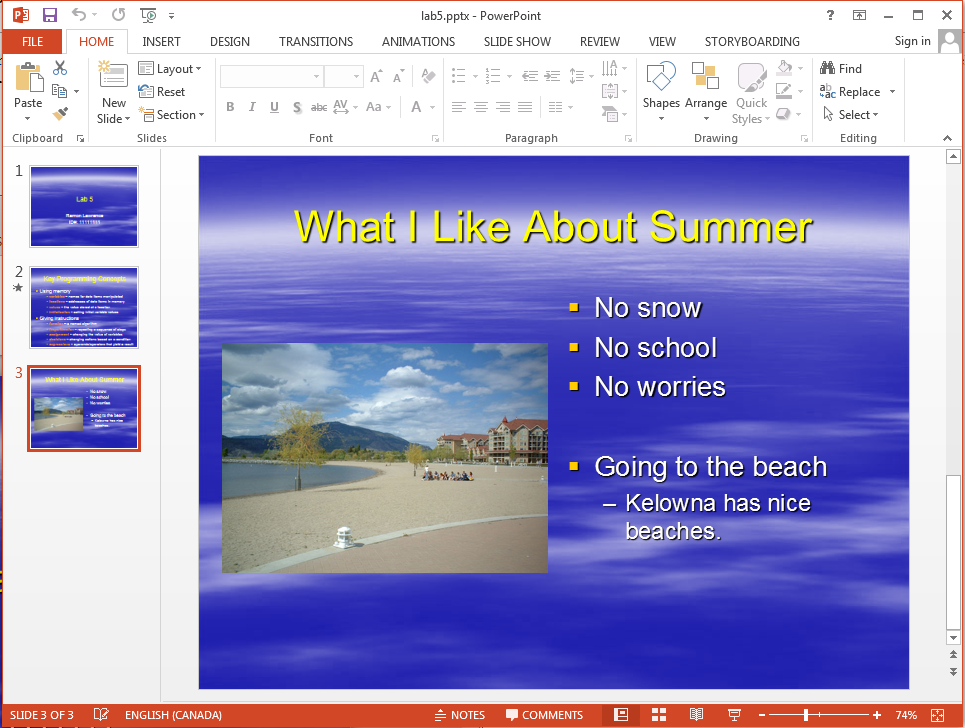
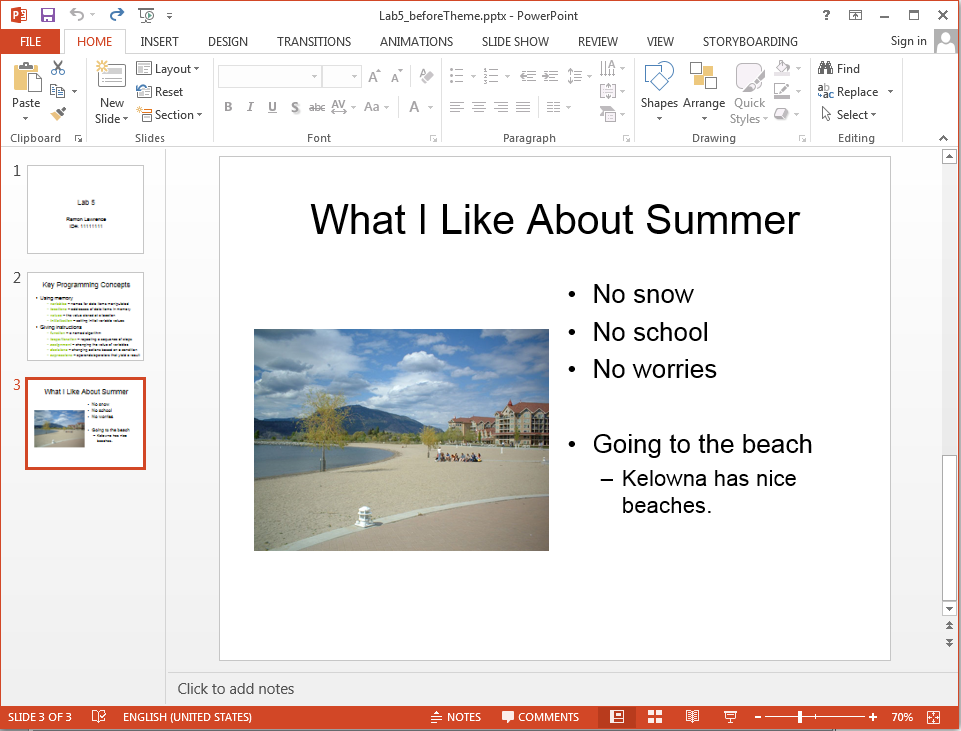
A slide layout is how the slide appears on the screen. Most of the time the slide has a title bar and one large text area. However, other slide layouts have a two-column text area or some combination of text areas, images, and tables. Our third slide will have an image on the left side and a text area on the right side. Create a new slide with placeholders for two pieces of content. If you have created the slide without the correct layout, you can adjust it by right-clicking on the slide, and selecting the layout option.
TASK: Create a new slide. Make this third slide have the "Two Content" layout.

Download an image by clicking on this link. Save the image to your directory. We will add the image on the left side of slide #3. Click on the picture icon in the left content placeholder and find the file that you just saved. Alternately, you can add an image by selecting the view tab. Complete the slide by adding text as shown below.
TASK: Add image and text to third slide.
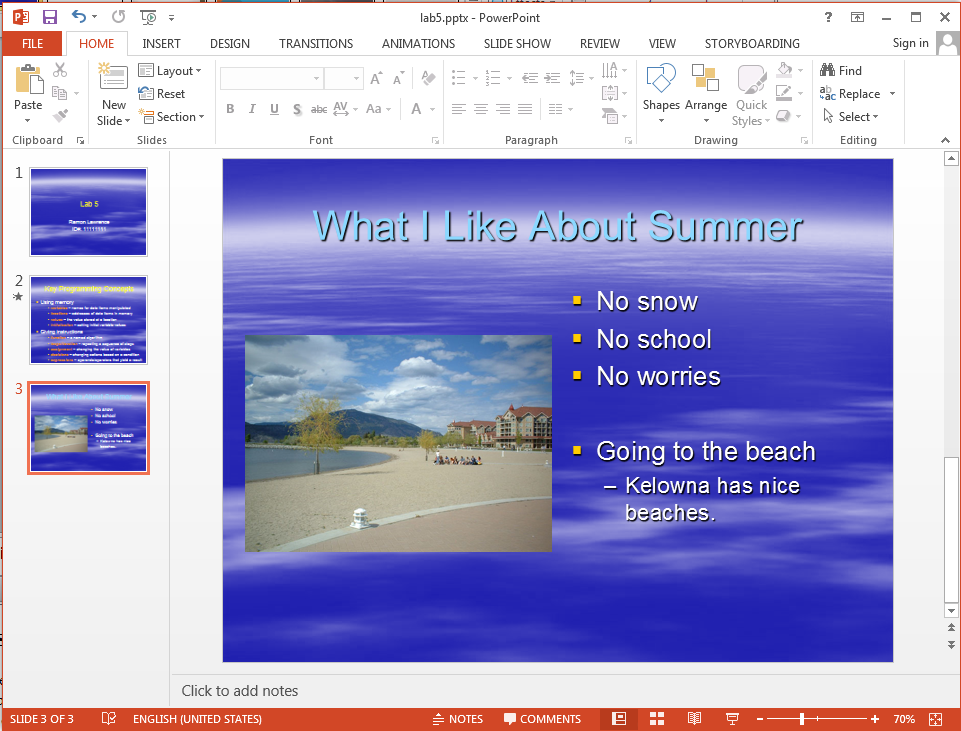
To change the design for all slides, select the Design tab and pick a design. We will pick the design called Clouds.
You can download it by clicking here, if it is not available by default.
TASK: Change the slide design to clouds.
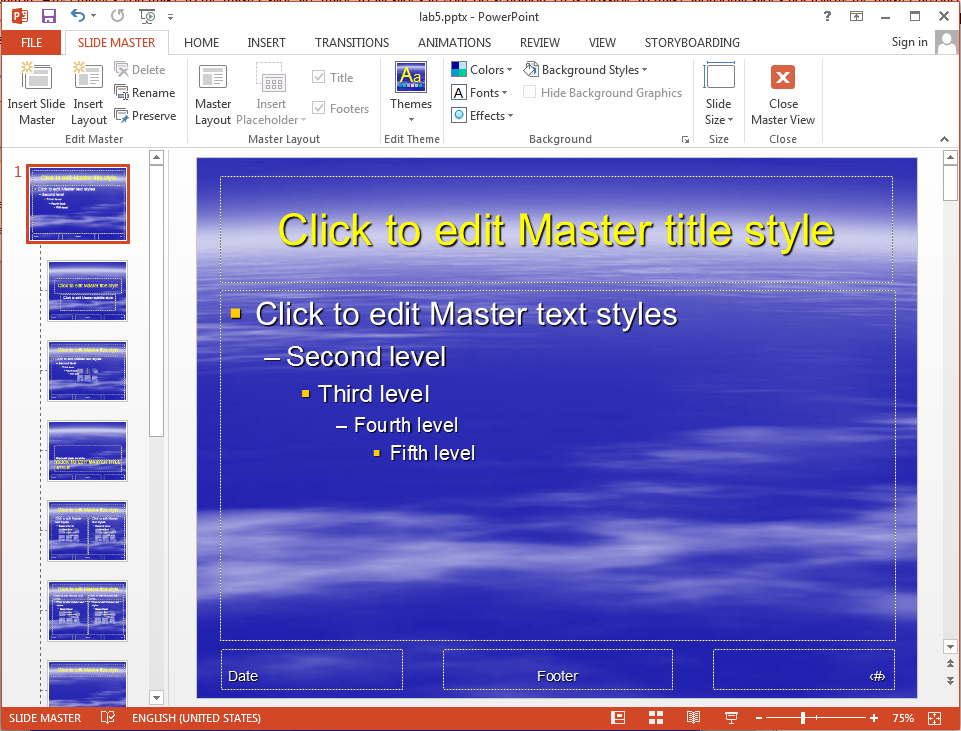
The master slide contains the template for all slides. (There are actually separate master layouts for slides, notes, and handouts.) To view and change the slide master, under the View tab, select the Slide Master button. Any changes you make to the master slide are made to all slides in your presentation. (It is possible to make individual slides not follow the master layout) The light blue title text is hard to read on the clouds background. Change the colour of the title text to yellow on the master slide. Note how that change is made on all slides in the presentation. The master slide is also where you would put headers, footers, background images, and page numbers.
TASK: Change the colour of the title text on the master slide to yellow.
A slide transition is a special action performed when you change slides during a presentation. Examples of slide transitions include wipe down, fade, and dissolve. Go to slide #2. Add a slide transition by going to the Transitions tab, and selecting the Dissolve transition from the gallery. A slide animation is used to move around images or text on a slide (whereas a slide transition was performed when changing between slides). To create a slide animation, go to the Animations tab. Select the Entrance Effect called Fly In, click Animation Pane. Make both "Using Memory" and "Giving instructions" Start on Click using the dropdown menu that appears when you click on the item in the list. Make every other item Start With Previous.
TASK: Add a dissolve slide transition and a fly in animation for the text area for slide #2.

To play a slide show you can:
For this lab assignment, submit using Canvas a single PowerPoint file called lab5.pptx that looks exactly as described at the start of the lab. Make sure to put your name and student # on slide #1.
0.5 marks will be deducted for every mistake or inconsistency between your PowerPoint document and the solution.